*This post may contain affiliate links for which I earn commissions.*
Introduction
A stand mixer is one of the most versatile and essential tools a kitchen, especially for those who enjoy baking and cooking from scratch. Whether you’re kneading dough for bread, whipping up cream for desserts, or simply mixing ingredients for cookies, a good stand mixer can make these tasks much easier and more efficient for you.
For beginners, using a stand mixer for the first time might seem intimidating, but once you understand the basics, you’ll quickly realize how much time and effort it will save. This guide is designed to help you get comfortable with your stand mixer, from setting it up to mastering the essential techniques. By the end, you’ll be ready to confidently tackle a variety of recipes and make the most out of your new kitchen companion.
Unboxing and Setup
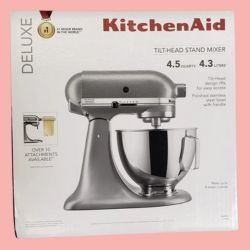
When you unbox your stand mixer for the first time, you’ll find several key components that are essential for its operation. Here’s a step-by-step guide to help you identify and set up your mixer:
1. What Comes Inside the Box?
Mixer Base: The main unit housing the motor. This is the heavy, sturdy part that keeps the mixer stable during operation.
Mixing Bowl: Typically made of stainless steel, this bowl is where your ingredients will go. It often locks into the base for added stability.
Attachments: Depending on your model, you’ll find a few basic attachments like the flat beater, dough hook, and wire whisk.
Instruction Manual: Always a good idea to keep this handy, as it includes specific instructions for your model.
2. Assembling the Mixer
Positioning the Mixer: Place your stand mixer on a flat, stable surface in your kitchen, making sure there’s enough room around it for easy access and airflow.
Securing the Mixing Bowl:
Tilt-head models: Tilt the head back and place the mixing bowl on the base, twisting it until it locks into place.
Bowl-lift models: Attach the bowl by hooking it into the arms and turning the lever to lift it into position.
Attaching the Beaters:
Align the beater (flat beater, dough hook, or whisk) with the attachment shaft.
Push the beater up into the socket and turn it clockwise to lock it into place.
3. Getting Familiar with the Controls
Speed Settings: Your stand mixer will come with a speed control dial or lever, usually ranging from slow speeds (1 or 2) for stirring and kneading, to high speeds (8 or 10) for whipping and aerating.
Tilt-Head or Bowl-Lift Mechanism: If your model has a tilt head, there will be a lever to unlock and lift the mixer head for easy access to the bowl and attachments. Bowl-lift models have a lever to raise or lower the mixing bowl instead.
4. Powering Up
Plug the mixer into a power outlet that can handle its wattage (this information is typically in the manual).
Before you begin mixing, make sure all attachments and the bowl are securely in place, and that the head or bowl is locked into position to prevent accidents.
By following these simple steps, your stand mixer will be fully assembled and ready to use in no time!
Basic Attachments and Their Uses
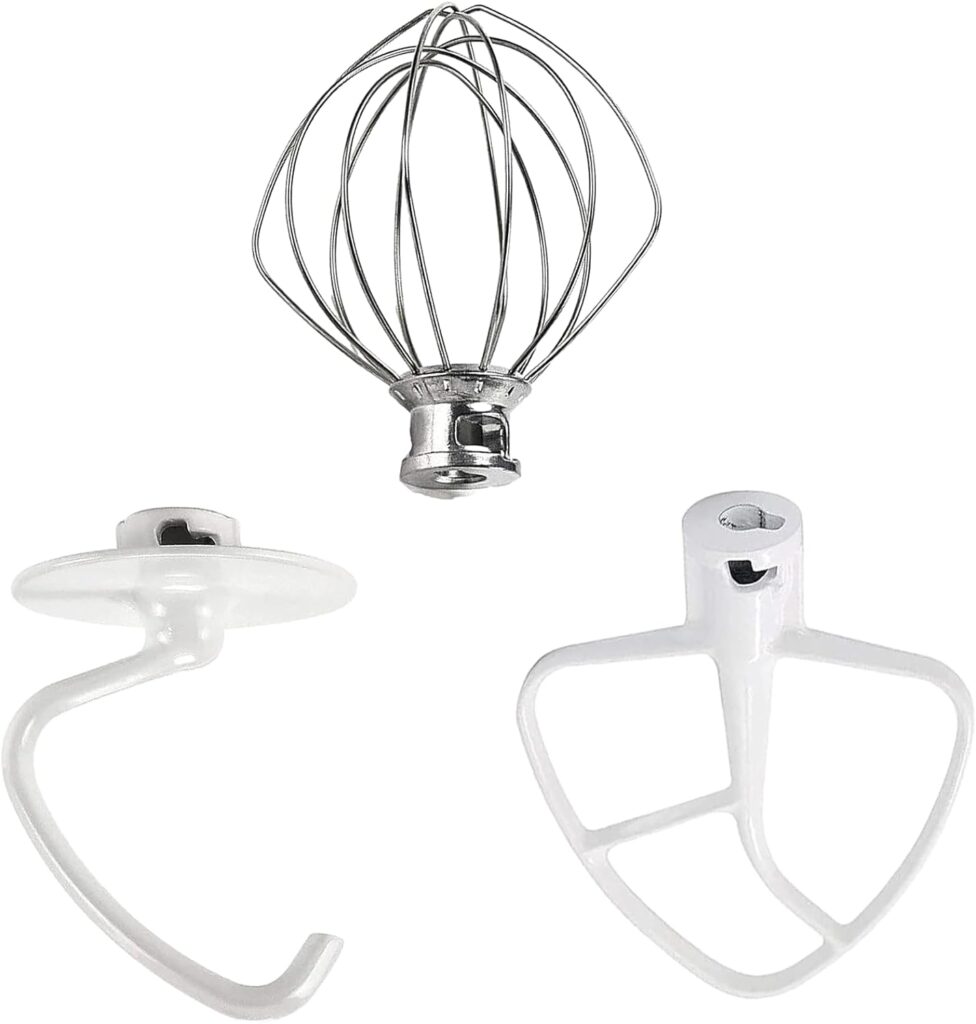
Your stand mixer likely comes with three core attachments: the flat beater, wire whisk, and dough hook. Each of these is designed for specific tasks, and knowing when to use them will help you get the best results from your recipes.
1. Flat Beater
Purpose: The flat beater is the most versatile attachment, ideal for mixing ingredients that require a moderate amount of blending. Like cake batters, cookie doughs, mashed potatoes, frostings and meatloaf or burger mixes
This attachment works well for creaming butter and sugar, combining ingredients for soft doughs, or mixing heavier batters where a whisk might not be strong enough.
2. Wire Whisk
Purpose: The wire whisk is designed to incorporate air into your ingredients, making it perfect for lighter, fluffier mixtures. This one is good for Whipping cream, beating egg whites, Meringues, light batters, like sponge cakes and mousses
How to Use: Use the whisk on higher speeds to whip ingredients to your desired consistency. It’s perfect for creating peaks in whipped cream or achieving the ideal foam in egg whites.
3. Dough Hook
Purpose: The dough hook is a must-have for making dough. Its spiral or C-shape design allows it to knead the dough by simulating the motion of hand kneading, without the physical effort.
Best For: Bread, pizza, pasta or any yeast doughs
How to Use: When making dough, the dough hook should be used on low to medium speeds. It kneads efficiently, ensuring the gluten develops properly without overworking the dough.
4. Optional Attachments (Additional Purchases)
Some stand mixers are compatible with a range of optional attachments that transform your mixer into a multi-functional kitchen appliance like
Pasta roller, food grinders for grinding meat, cheese, or vegetables and vegetable spiralizer that make spiral cuts for salads or garnishes.
Knowing which attachment to use will not only save you time but will also help ensure your ingredients are mixed to the correct consistency. Whether you’re making dough from scratch or whipping up light-as-air meringues, each attachment plays a vital role in your kitchen adventures.
Getting Started: Basic Operation
Now that your stand mixer is assembled and you’re familiar with the basic attachments, it’s time to start using it. Here’s a simple guide to get you mixing like a pro:
1. Securing the Mixing Bowl and Attachments: for tilt-head models, tilt the head back and place the mixing bowl onto the base, twisting it until it locks securely. And for bowl-lift models, hook the bowl onto the arms and use the lever to raise it into the proper mixing position.
To attach the Beater/Whisk/Dough Hook: Select the appropriate attachment for your recipe, then align the attachment with the attachment hub and push it upwards. Turn it clockwise to lock it into place. Double-check that the attachment is securely connected before starting.
2. Understanding the Speed Settings:
Stand mixers come with various speed levels that allow you to control the intensity of the mixing process. Low speeds (1–2): Ideal for gentle mixing, stirring, and kneading heavy doughs like bread or pizza. Medium speeds (3–6): Perfect for mixing cake batters, cookie doughs, and similar medium-thickness mixtures. High speeds (7–10): Use these for whipping, aerating, or incorporating air into ingredients, such as whipping cream or beating egg whites.
Tip: Always start on a lower speed to prevent ingredients from splashing out of the bowl, especially with dry ingredients or liquids.
3. Locking the Head or Bowl (Safety First!)
Tilt-Head Models: Once the attachment and bowl are in place, pull the lever to lower the head, then lock it into position. This keeps the head secure and prevents it from moving while the mixer is in use.
Bowl-Lift Models: Ensure the bowl is lifted into position using the lever before starting the mixer.
This step is crucial for safe operation and ensures proper mixing.
4. Mixing Tips
Gradual Speed Increase: Always start on a low speed and gradually increase to avoid splashing or flour clouds. This is especially important when working with dry ingredients or large amounts of liquid.
Scraping the Bowl: Depending on the recipe, you may need to pause the mixer to scrape down the sides of the bowl with a spatula, ensuring all ingredients are incorporated evenly.
Don’t Overmix: Be mindful not to overmix certain batters or doughs (like cakes or breads) as it can affect texture. Stop mixing as soon as ingredients are combined or the dough reaches the desired consistency.
5. Safety Tips
Never Insert Hands or Utensils While Mixing: Keep your hands and any utensils away from the moving attachments. If you need to scrape down the bowl or add ingredients, stop the mixer first.
Use the Splash Guard (if provided): Some stand mixers come with a splash guard to prevent ingredients from splattering. If you have one, snap it onto the bowl before starting the mixer, especially when working with liquids or flour.
6. Final Check
Once your ingredients are mixed, turn off the mixer, unplug it, and carefully remove the attachment by turning it counterclockwise. Lift out the mixing bowl and detach any remaining dough or batter from the beater or hook.
With these steps, you’ll have the basics covered for operating your stand mixer with confidence. You can now tackle a wide range of recipes, from bread dough to whipped cream, with ease.
Common Mixing Techniques
Stand mixers make various cooking and baking tasks easier, but knowing how to use the right technique for the job is key to achieving the best results. Here are some common mixing techniques you’ll frequently use with your stand mixer:
1. Creaming Butter and Sugar
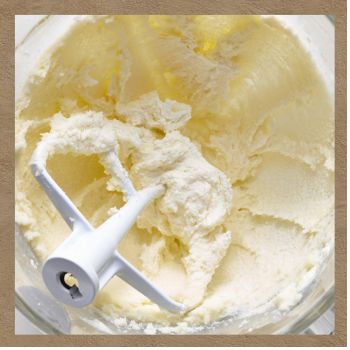
Purpose: Creaming butter and sugar are the foundation of many baked goods, like cookies and cakes. The goal is to incorporate air into the mixture, resulting in a light and fluffy texture.
How to Do It: Start with softened butter in the mixing bowl. Use the flat beater attachment on medium speed. Add sugar gradually and beat until the mixture becomes pale and fluffy, usually 3–5 minutes.
Tip: Scrape down the sides of the bowl halfway through to ensure everything is evenly combined.
2. Kneading Dough
Purpose: Kneading dough helps develop the gluten in the flour, giving bread and pizza dough their structure and chewiness.
How to Do It: Attach the dough hook and place the dough ingredients in the bowl. Start the mixer on low speed (1 or 2) to prevent flour from flying out. After the ingredients come together, increase to medium speed (3 or 4) to knead the dough for about 5–7 minutes.
Tip: The dough is ready when it pulls away from the sides of the bowl and feels smooth and elastic. Be careful not to over-knead, which can make the dough tough.
3. Whipping Egg Whites or Cream
Purpose: Whipping adds air into egg whites or cream, making them light, fluffy, and perfect for meringues, soufflés, or whipped cream.
How to Do It: Use the wire whisk attachment for maximum aeration. For egg whites, ensure the bowl and whisk are clean and free of grease. Start on medium speed and increase to high speed once the mixture starts to froth. For cream, use chilled heavy cream and whip on medium-high speed until soft or stiff peaks form, depending on the recipe.
Tip: For egg whites, add a pinch of cream of tartar to stabilize the foam. For whipped cream, stop mixing as soon as stiff peaks form to avoid turning it into butter.
4. Folding and Gently Mixing
Purpose: Some recipes, such as those for delicate batters like sponge cakes or mousses, require a light touch to prevent deflating the air you’ve worked into the mixture.
How to Do It: Use the flat beater on the lowest speed setting (or fold by hand) to gently incorporate ingredients like whipped egg whites or flour into a batter. Stop the mixer as soon as the ingredients are combined to avoid overmixing.
Tip: You can also pause the mixer and fold ingredients by hand using a spatula for more control over delicate mixtures.
5. Beating and Blending
Purpose: This technique is for thoroughly combining ingredients, such as batter for cakes, pancakes, or quick breads.
How to Do It: Use the flat beater and start at a low speed to combine ingredients without splattering. Gradually increase to medium speed for smooth, lump-free batters.
Tip: Avoid beating too long, as overmixing can lead to dense or tough baked goods, especially when working with flour-based batters.
6. Incorporating Dry Ingredients
Purpose: Mixing dry ingredients like flour, cocoa powder, or powdered sugar into a wet mixture without creating lumps.
How to Do It: Use the flat beater on low speed to start incorporating dry ingredients gradually. Add dry ingredients slowly, using a spoon or sifter, to prevent a flour cloud.
Tip: Pause the mixer periodically to scrape down the sides of the bowl for even mixing.
Mastering these common techniques will help you get the most out of your stand mixer and ensure your recipes turn out perfectly. Whether you’re creaming butter or whipping up meringue, each technique brings you closer to professional-level results in your kitchen.

